Dlink Wifi Extender Setup Via Dlinkap.Local
Dlinkap.local is the web address required to execute the Dlink extender setup process. All one needs to do is, power up the extender, connect it to the client device, access dlinkap local, enter the login credentials, and read the on-screen instructions. Once the process is finished, you can make the required connections with the WiFi with ease.
In case you could not wrap your head around the brief explanation of the process, read the details procedure on this page, learn how to join your device, and enjoy fast internet.
Dlink Extender Setup: Browser-Based Setup Method
Prerequisites
There are a few requirements that should be taken care of so that no technical issues arise during the Dlink WiFi extender setup process. They are as follows:
- Your web browser should be updated to the latest version.
- Cache, browsing history, and cookies should not be accumulated in the browser.
- The client device should be free of viruses.
- At last, have the WIFI PASSWORD and SSID jotted down on a notepad.
Now, unwrap your networking device and learn how you can take the dlinkap.local setup process by following the instructions highlighted in the following section.
Detailed Procedure
Prior to following the guidelines given below, find the perfect location for your D-Link WiFi range extender. Ensure that it is neat and clean. Once done, then:Step 1: Setup the Device Hardware
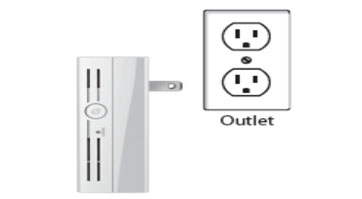
- Locate an electrical socket in one of the rooms of your house.
- Plug the D-Link wireless extender into it and hit the power button.
- Give sufficient time for the LED light to become solid or stable.
- Ensure that the extender is placed somewhere close to the wireless router.
Step 2: Connect to the Network
- Get your hands on the computer and open the wireless utility.
- Select the NETWORK NAME of the D-Link extender model you are using.
- Enter the password, the one that you jotted down on the paper.
- Click the CONNECT button and wait for the client device to access the internet.

Step 3: Log in to the Extender
- Open an internet browser and access dlinkap.local.
- It is advised that you restrain typing it as https dlinkap local or dlinkap/local.
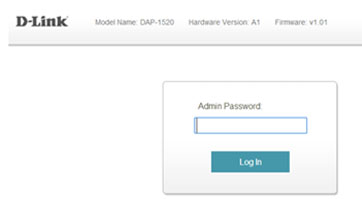
- Once the screen shifts, enter the username and password.
- You should know that the USERNAME is ADMIN and PASSWORD is BLANK
Step 4: Follow More Instructions
- Click the LOGIN button and then the SETUP WIZARD button.
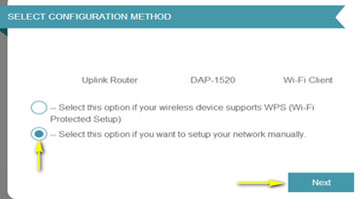
- To proceed with the Dlink extender setup process, click the NEXT button.
- Select the second option to do Dlink WiFi extender setup manually.
- Click the NEXT or CONTINUE button.
Step 5: Choose the Network to Extend
- From the list, choose the network you are keen to use and hit SELECT.
- Once done, input the uplink network password and hit next to CONTINUE.
- Soon your extender model will re-broadcast the WiFi connection from the uplink router.
- For both networks, i.e. 2.4 GHz and 5 GHz, the SSID and password will be generated.

Soon a window will appear displaying “Setup Completed”. This is a clear sign that you have finished setting up your networking device
In case you are interested in changing any settings of the D-Link extender, then you can by using the dlinkap.local web address. If you are unable to access dlinkap.local, then here is why.
Fix: See that the address you are typing during Dlink WiFi extender setup is dlinkap.local. Do not enter it with spaces like https dlinkap local.
Fix: Access the settings menu of your internet browser and update it to its latest version. Also, clean it using the same option.
Fix: Ensure that the client device which you are using is not infected with viruses or similar malicious software. For this, you need to install an antivirus app.
Fix: Do not use the search bar of the web browser which you are using to access the dlinkap.local web address.
Fix: Use the correct WiFi password or a damage-free Ethernet cable so that a proper connection can be established between the devices.