D’link DAP 1610 Setup: Full Instructions
Dlink DAP repeater is a networking device that provides you high speed wireless internet connection. It is compatible, and has convenient design. The D’link DAP 1610 setup is easy to complete and also easy to use. This Dlink networking repeater extends the WiFi signals in your home or apartment and it provides you latest wireless network security and encryption as well to protect your home network. If you made a purchase of this incredible networking device, then you can take help to complete your Dlink DAP device installation. You just have to follow simple steps that are written below.
But first, you must take an overview on Hardware of the Dlink DAP 1610 extender, which is given down below.
Hardware Overview
1. Status or WPS LED- This LED light shows the current status of the Dlink DAP networking device.
2. Signal LED- When this light lit up green it means the WiFi signal is strong and when it rings orange then it indicates a Weak WiFi signals.
3. Power Indicator- Power LED light ring many colors. So we make informative description box that will give you an overview on these color lights meaning.
| Color | Status | Description |
|---|---|---|
| Red | Solid | If you find the power LED ringing red then your Dlink device is booting up. |
| Green | Solid | It means DAP device is receiving power and connected to host network. |
| Blinking | Green blinking light indicates WPS mode is active and searching for WPS device. | |
| Orange | Blinking | Orange light means the networking device is not connected to host network. |
Now, let’s take a look on the hardware D’link DAP 1610 setup, which is written below here.
Hardware Setup of Dlink DAP 1610
To start the Dlink repeater network, you have to connect your extender to the router with network cable and then plug it in an electric wall socket. Just follow simple and short paragraphs to know how to link your router with the repeater.
Linking Router to WiFi Extender
You have to connect your router to Dlink device via an Ethernet cable. The Cable linking pattern is WAN port of the WiFi extender and LAN port of the WiFi router. If you find any cut on the Ethernet cable, then you must replace with new one.
Turn On Dlink DAP Repeater
Now, you need to turn on the router first and then plug in the repeater in nearest wall socket to supply power to Dlink repeater. Then locate and press power button (on the front of the networking device).
We hope you have completed the hardware setup of the Dlink DAP 1610 device. Now, have a look on how to manage the settings and network of your network device. After that you will complete the D’link DAP 1610 setup successfully.
Configure settings of Dlink 1610
Connect Your Computer to Network
For configure the settings of the Dlink device, you have to connect your computer or laptop to the repeater with an Ethernet cable. Don’t use wireless connections to log in to the web interface of the Dlink DAP. After linking your computer to the extender, open up any web browser in your computer.
Log in to Dlink Extender
In the browser, just locate the address bar and search dlinkap.local. On computer screen, you will see a login page. Here, you will find username and password blank spaces. You have to fill these spaces using the user manual that comes with the Dlink DAP 1610 networking device. After filling all the details, just click on the Sign In button which is given under the login spaces.
Manage Settings and Network
You will enter the interface of the Dlink networking device. Here, you must manage settings and network of Dlink extender. You can also update the firmware, change the password, enable WPS mode and much more.
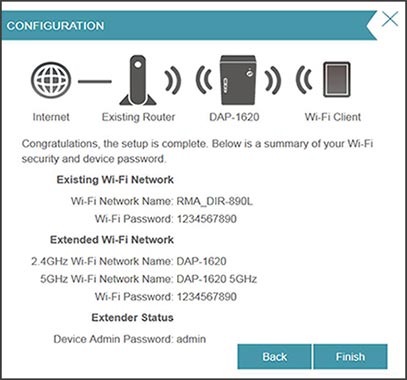
Hopefully, you have configured the settings and network of the repeater with the help of this above written paragraphs. Now, you have completed the D’link DAP 1610 setup.
The End Lines
Here are the bottom lines of this informative blogs in which you have learned how to complete the D’link DAP 1610 setup with ease. In these setup instructions, you have seen Dlink hardware overview, Hardware installations and configuration of Dlink extender. After completing the setup, hopefully you are experiencing the expanded internet network connection in every corner of your apartment.